Hello Husarion community!
We found out bug in firmware of SBC used in ROSbot PRO which is UP Board. Simple description of issue you can find on producer community forum. Long story short, if your ROSbot 2.0 PRO works slow, you should check this! (NOT FOR version R1.1 and earlier)
Updating the BIOS in the UP Board
BIOS versions R2.1-R2.3 (possibly the range is greater) have a bug that locks the processor frequency to 0.48 GHz. Such UP Boards should be updated to version R2.5 (checked).
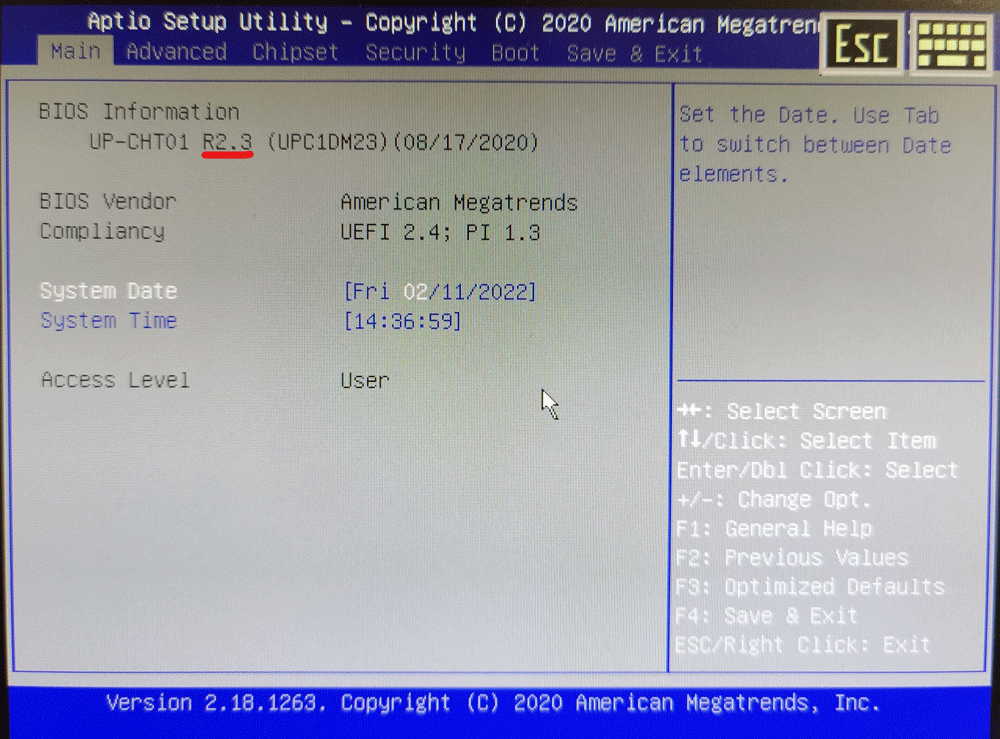
Checking the BIOS version
- Connect the HDMI, keyboard and power supply.
- Turn on the UP Board, press the Delete key.
- A window asking for the BIOS password will appear - by default it is not. Press Enter .
- A window with BIOS settings will appear, check the version - it should be at least R2.5. If not, go to the BIOS update section.
Check in Linux if there is a problem (instead of BIOS version)
- Start the terminal (SSH, or after connecting the monitor).
- Run the command
watch -n 0.1 lscpu | grep -m1 MHz | awk '{print \ $ 3}'. - Values should fluctuate and be sometimes above 480 MHz.
- If the value is fixed at 480MHz, a BIOS update is required. Go to the BIOS update section.
BIOS update
Preparing the flash drive
- Download archive.
- Format the flash drive using the FAT32 file system.
- Unpack the archive on a USB flash drive, making sure that the files are not in an additional folder.
Update
Upgrading from versions ** R1.1 and earlier ** requires special steps. Do not update the BIOS to R2.5 directly!
Interrupting the flashing process will damage the UP Board! Make sure the power does not go out!
-
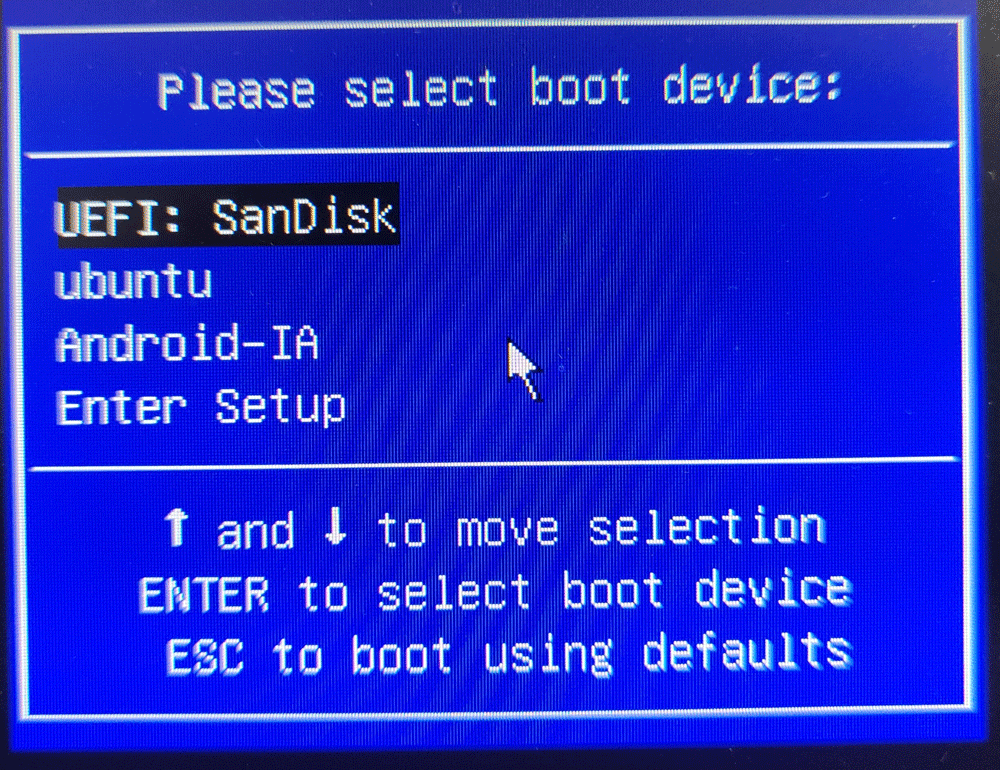
Connect the HDMI, keyboard, and power
-
On startup, hold down F7 .
-
From the opened Boot menu, select with the arrows:
UEFI: <flash drive manufacturer>and confirm with Enter
-
Quickly press Esc
-
Enter the following commands in sequence:
- fs1:
- GO.nsh
-
The update process will end after approximately 3 minutes.
-
Remove the flash drive and turn off the power.
-
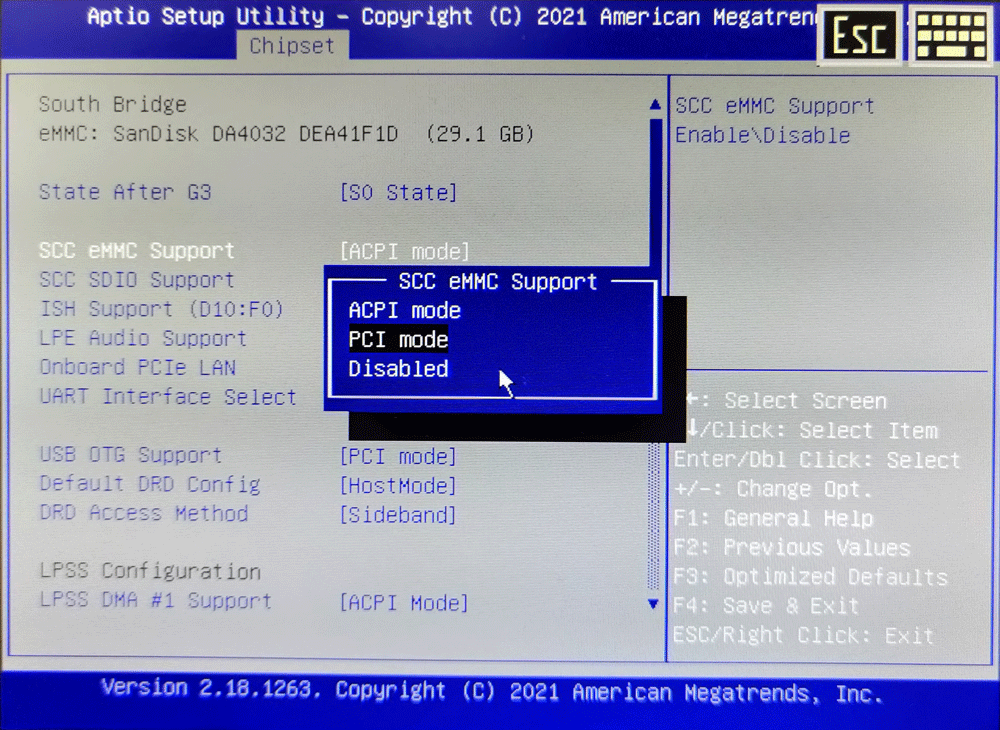
Enter the BIOS (described in the section Checking the BIOS version)
-
In the tab
Chipset→South Bridge, change the itemSCC eMMC SupportfromACPI modetoPCI mode
-
Save your changes by typing F4 and confirming to save your changes.
-
(optional) check the BIOS version according to the instructions above

In case of any issues with update, please let us know!
Best regards,
Hubert